Bay Area News The coolest thing to do in each Bay Area city
A bucket list of Bay Area things to do
http://www.sfgate.com/bayarea/article/The-coolest-thing-to-do-in-each-Bay-Area-city-12411579.php
Other World Computing Blog The New iPhone X Gestures and How To Use Them
 For the first time in the ten years since the first iPhone hit the market, users now have a new set of gestures to master in order to control the latest phone — the iPhone X. There's no home button on the device, so Apple's engineers and designers worked up a new set of intuitive gestures. Whether you've just purchased an iPhone X or are considering one for a holiday gift to yourself, here are the gestures you'll need to know.
Waking Up The iPhone X
Like all of the iPhones since the iPhone 6s, you can pick up your iPhone X to wake it up in what's called "raise to wake". You can also just tap on the screen as you have in the past, or press the sleep/wake button on the right side of the iPhone X. What's changed is how you unlock the iPhone X. In place of a passcode or Touch ID, you just look at the screen of the iPhone X and Face ID authenticates you.
Related: NuGuard KX Protective Case Now Available for Apple iPhone X
Blogger Yoni Heisler at BGR found out that Face ID actually learns to identify the user's face in those situations where you're not looking at the iPhone X face-on. The iPhone X will prompt you in a case like this to tap in your passcode, and in the future the iPhone X knows that your sideways glance is a valid way to unlock the phone and will "look" for you for Face ID authentication.
Finding Your Way Back Home
Since there's no home button, there's no longer any way to press it to go to the home screen. Instead, just swipe up from the bottom of any screen to make the home screen visible.

(Swipe gestures for Control Center (red) and Notification Center (green).
Controlling Control Center
The old gesture to view Control Center was a swipe from the bottom of the screen…which is now what makes the home screen viewable. There's a new gesture replacing that on the iPhone X. Swipe down from the upper right corner of the screen (in the area where the battery and signal strength indicators are) to the center of the screen, and Control Center appears (see the red arrow on the screenshot at right). In the current iOS 11.2 beta, there's a faint underline beneath those indicators as a reminder that the upper right corner is the starting point for the Control Center gesture.
To make Control Center disappear, just use the home screen gesture — swipe up from the bottom of the screen.
Notification Center
Notification Center is made visible on older iPhones with a swipe down from the top of the screen. On iPhone X, swipe down from the top left corner of the screen to the center of the screen (see the green arrow on the screenshot at right). A swipe up from the bottom of the screen makes Notification Center go away.
Switching Apps
To see the multitasking view showing recently-used apps in the past few versions of iOS, you double-tapped the home button from the home screen. This displayed a series of floating app "cards" that you could swipe through, then tap on to bring up another app.
With iPhone X, the new gesture is decidedly different — you swipe up from the bottom of the screen, then pause with your finger still on the screen. The multitasking view appear, and it's then possible to swipe left and right to switch between apps.
For those who have had iPhones with 3D Touch, you know that there was a gesture where you could push and hold on the left side of the screen while in an app, then pull to the right to bring the last-used app into view. On the iPhone X, the same thing can be done by using your thumb to swipe up from the bottom of the display, then in an arc to the right side of the phone.
In addition, whenever you're in an app you'll see a line (usually black or white) at the bottom. Swipe left or right on this line (see blue arrows below) to move to the previous or next app.

(Swipe left or right on the "line" at the bottom of an app to switch to other apps.)
Paying with Apple Pay
When standing in front of an Apple Pay cash register with your iPhone X in hand, just double-tap the side button (the sleep/wake button) while looking at the screen. Face ID authenticates you, and the payment is made in no time at all.
This process also works when making purchases from the App Store. Once you've decided to purchase an app, a prompt (see right side of the screenshot below) appears to remind you to double-click that button to authenticate and install.

(When purchasing apps in the App Store, you'll be asked to double-click the side button to authenticate.)
Siri
The best way to invoke Siri on an iPhone X is through "Hey, Siri". By doing this, Siri doesn't need to authenticate you and comes right back with an answer. If your iPhone X is in your hand, or it's not appropriate to use "Hey, Siri", then press on the side (sleep/wake) button to invoke Siri.
Snapping Screenshots
The previous gesture for making iPhone screenshots was to press the side button and home button at the same time. Since there's no home button on the iPhone X, you now squeeze the side and volume-up buttons simultaneously. The screenshot appears in the lower left of the screen, and tapping the screenshot thumbnail brings it into a editor for cropping and annotation.
Turn It Off
The sleep/wake button does exactly that on an iPhone X — puts the iPhone to sleep or wakes it. To totally power down the device, use the same gesture you just learned for making screenshots, except keep holding the side and volume-up buttons until you feel the iPhone give you a haptic alert indicating that Face ID has been temporarily disabled. When that happens, a look at the screen reveals three sliding buttons for turning off power, showing your medical ID or making an emergency SOS call.
By the way, if someone is trying to force you to use Face ID to authenticate and unlock your iPhone X and you don't want to do that, use the same gesture. With Face ID shut off temporarily, you'll be asked to enter your password instead…and you can refuse to do that.
Force Restarting the iPhone X
What do you do if your iPhone X is locked up and no amount of tapping or swiping seems to be working to unlock it? It's time to force a restart, which now takes a 3-step process:
1) Press and release the volume-up button
2) Press and release the volume-down button
3) Press and hold the side (sleep/wake) button
While performing step 3, the screen of the iPhone X will go black, after which the appearance of the Apple logo shows that the device is rebooting.
Don't let this article worry you if you're about to get an iPhone X. Most of the gestures are extremely easy to use and become second nature after being used a few times.
Sent with Reeder
NYT > Home Page Five Technologies That Will Rock Your World

After the Russian hacking of the 2016 election, many people worry that technology has gone too far. And yet it continues to evolve rapidly.
Largely because of the success of companies like Google, Facebook and Amazon, investment in tech research continues to climb. At the same time, because of the sudden maturation of mathematical methods that can deliver what is commonly called artificial intelligence, the possibilities are expanding.
There is reason for concern, but also for optimism. The new wave of artificial intelligence will reduce jobs, but will also improve your health and products like your smartphone. Here are five areas where tech companies, large and small, will change the way we live.

Over the last half decade, with help from the complex algorithms deep neural networks, computers have learned to see. Loosely based on the web of neurons in the human brain, a neural network can learn tasks by identifying patterns in vast amounts of data. By analyzing millions of bicycle photos, for instance, a neural network can learn to recognize a bicycle.
This means that services like Facebook and Google Photos can instantly recognize faces and objects in images uploaded to the internet. But artificial intelligence will also lead to a revolution in health care. Using these same techniques, machines can also learn to identify signs of disease and illness in medical scans. By analyzing millions of retinal photos, a neural network can learn to recognize early signs of diabetic blindness. By analyzing CT scans, a neural network can learn to spot lung cancer.
Such technology will improve health care in places where doctors are scarce. But eventually, it will streamline care in the developed world as well. Google is already running tests inside two hospitals in India, and the start-up Infervision has deployed similar technology in hospitals across China.
In the longer term, similar methods promise to rapidly accelerate drug discovery and so many other aspects of health care. "Everything from the nature of the food that we grow and eat to the drugs that we give ourselves to how we monitor the impact of these things is all being transformed by A.I. in deeply profound ways," said Matt Ocko, a managing partner at DCVC, a San Francisco venture capital firm that has invested heavily in this area.
Neural networks are not limited to image recognition. Far from it. These same techniques are rapidly improving coffee-table gadgets like the Amazon Echo, which can recognize spoken commands from across the room, and online services like Skype, which can instantly translate phone calls from one language to another. They may even eventually produce machines that can carry on a conversation.
Recently, said Luke Zettlemoyer, a University of Washington professor, there has been a "huge phase shift" in the area of natural language understanding — technology that understands the natural way people talk and write. Companies like Google, Facebook, and Microsoft are at the forefront of this movement, which promises to fundamentally change how we interact with phones, cars, and potentially any machine. Many companies are moving down the same path, including Replika, a San Francisco start-up.
With help from machine learning, Replika offers a smartphone "chatbot" that acts as a kind of personal confidante, chatting with you in moments when no one else is around. But the hope is that these techniques will improve to where they serve you in so many other ways. What if Alexa was truly conversational, if you could have a back and forth dialogue? Right now, it is about basic questions and commands. Today, it "recognizes" words very very well. But truly "understanding" complex English sentences is beyond machines at this point. What if machines could carry on a dialogue like Hal in 2001?

Some people argue there are even better ways of interacting with computers by using brain waves. Rather than telling a computer what you want, many companies say they believe you could just think it.
Using electroencephalography, or EEG — a longstanding means of measuring electrical brain activity from sensors placed on the head — the start-up Neurable is building a virtual reality game that can be played with the mind. EEG is limited for this kind of use, but other researchers, including at Facebook, aim to build a far more powerful systems using optical sensors. Facebook hopes that, in a few years, this technology will let people type with their minds five times faster than they can with a smartphone keyboard.
These techniques will also face physical limits, and that may bar the way to Facebook's goal. But various start-ups, including Neuralink, founded by Elon Musk, the chief executive of Tesla, are going several steps further, hoping to read brain activity from chips implanted inside the skull. At first, they will limit this technology to people with disabilities. But ultimately, Mr. Musk and others hope to also implant chips in healthy people.
"It is implausible that this technology would go straight into healthy people," said Ed Boyden, an M.I.T. neuroscientist who is also an adviser to Neuralink. "But there is a natural trajectory where, if a medical technology proves effective, it can move into normal individuals as well."
Want more science fiction in your everyday reality? As entrepreneurs like Mr. Musk work to put a chip in your head, others are working to put cars in the skies.
Even as he sets the pace in the race to autonomous cars, Larry Page, the chief executive of Alphabet and a founder of Google, is backing Kitty Hawk, a start-up that wants to move commuting into the air. And many others, including the start-up Joby Aviation, Uber and Airbus, are working on vehicles capable of flying above congested roads. These vehicles take many forms, but generally, they carry a single rider and take off like a helicopter: straight up.
At first, Kitty Hawk will sell its vehicles to hobbyists. But the company hopes it can eventually convince the general public, and regulators, that flying cars make sense. That is no easy task. After all, these cars will require a new kind of air traffic control.

Even more outlandish? It's the prospect of a quantum computer. Drawing on the seemingly magical properties of quantum physics, such a machine would be exponentially more powerful than computers of today. Think of it this way: A quantum computer could instantly crack the encryption that protects the world's most private data.
The problem is that these machines are enormously difficult to build. but progress has accelerated. Google, IBM and Intel are investing heavily in this push, as are start-ups like Rigetti Computing.
Researchers say they believe that quantum machines eventually could accelerate drug discovery, streamline financial markets, solve traffic problems and more.
"It is a completely different paradigm for processing information," said Robert Schoelkopf, who helped invent the techniques that are driving so much of quantum computing research. "So we think that known applications are just the tip of the iceberg."
Sent with Reeder
Petri IT Knowledgebase The Useful Clean Up Mailbox Option Hidden in OWA


Even with 100 GB mailbox quotas, some people do run out of space and need more to keep receiving new mail. There is no way to increase an Exchange Online mailbox quota past 100 GB, so if someone like this comes calling, you can recommend them to move a pile of email into an expandable archive or empty their Deleted Items folder to free space. Later, when the panic has abated, you might consider applying a retention policy to the mailbox to keep it under some sort of control.
Or you can tell the user to fire up OWA and select some folders for cleaning with the very useful "Clean up mailbox" feature buried in OWA. Go to Options (cogwheel), select Mail, and voilà (Figure 1)! A link to Clean up mailbox also appears under mailbox usage in the General section of options.

Figure 1: OWA Options reveals "Clean up mailbox" (image credit: Tony Redmond)
The feature appeared without warning. At least, no one from Microsoft said anything about it at the recent Ignite conference, I can find no documentation online, and it is not listed in the Office 365 Roadmap. The feature is unique to OWA and does not appear in Outlook desktop or the mobile clients. It's a mystery, albeit a nice surprise.
Before you can do anything, OWA enumerates the folders in your mailbox and calculates how much space each folder occupies, with Deleted Items and Junk Email at the top of the list. You can get a similar view with PowerShell:
[PS] C:\> Get-MailboxFolderStatistics -Identity TRedmond | Format-Table Name, ItemsInFolder, FolderSize
The difference is that OWA excludes many of the utility folders found in user mailboxes (like the Audits folder) and only lists those that hold user data. To decide how best to free up space, you select individual folders and then look at the clean-up options proposed by OWA. For instance, in Figure 2 we see that my Inbox occupies 1.26 GB for 6,959 messages. Cleaning out messages older than 12 months will remove 3,583 items. While OWA does not tell you this, it is reasonable to assume this will reclaim at least 0.5 GB.

Figure 2: Deciding how much email to remove (image credit: Tony Redmond)
Before OWA removes anything, you must confirm that the operation should proceed (Figure 3).

Figure 3: The warning about permanent removal (image credit: Tony Redmond)
Permanent removal means that the items do not go into the Deleted Items folder. Instead, they go into the Deletions sub-folder under Recoverable Items and stay there for between 14 and 30 days, depending on the deleted items retention period configured for the mailbox. During this period, you can recover messages using the Recover Deleted Items feature available in OWA or Outlook.
Once the retention period elapses, the messages are irrecoverable because Microsoft does not take backups for Exchange Online. Given the sheer number of mailbox databases running inside Exchange Online, it is unreasonable to expect Microsoft to take traditional backups. This has always been the case and if you are uncomfortable with this situation, you can put mailboxes on hold to force Exchange to keep the data. Users will not be able to recover messages after the retention period elapses, but administrators can run content searches to find and recover items if necessary.
Alternatively, you can investigate cloud-based backups for Exchange. Before you do, read this article and review the comments in the Microsoft Technology Community.
Even if you are not under pressure to free space in your mailbox, it is still a good idea to have a regular clean-out. Few messages need to be kept for extended periods and if items are needed for compliance purposes, they are probably on hold (or should be).
The problem with features buried deep in a list of options is that most users never find them. Who has the patience or the time to investigate every setting in OWA Options? I don't. But I was glad that I found this one.
Follow Tony on Twitter @12Knocksinna.
Want to know more about how to manage Office 365? Find what you need to know in "Office 365 for IT Pros", the most comprehensive eBook covering all aspects of Office 365. Available in PDF and EPUB formats (suitable for iBooks) or for Amazon Kindle.
The post The Useful Clean Up Mailbox Option Hidden in OWA appeared first on Petri.
Sent with Reeder
Macworld iOS 11: How drag and drop works
It took two years for the iPhone to get one of the most basic functions of modern productivity: copy and paste. The logical next step was drag and drop, but that's taken considerably longer to implement. Still, the day is finally here: With iOS 11, Apple has added systemwide support for dragging and dropping data all around the system—with a few major caveats.
(If you missed it, here's out full review of iOS 11.)
This is a feature focused on the iPad. In fact, when Apple was first building iOS drag-and-drop, it was originally destined to only be available on iPads. At some point, Apple decided that iPhone users could take advantage of drag-and-drop too, and so added support for it—but only within individual applications. So on the iPhone in iOS 11, you can drag text from out of one note in Notes, switch to a different note, and drop it in. But if you want to drag and drop across apps, you'll need to use an iPad.
That's the bad news. Now here's the good: dragging on dropping on the iPad is pretty great. It takes some getting used to, but once you realize how powerful and flexible drag-and-drop is on the iPad, you'll never want to use iOS 10 again. (More good news: Nobody is going to make you go back to iOS 10.)
 Jason Snell
 With Split View, you can perform a task like dragging and dropping a URL from Safari into a document you are creating with a text editor.
Here's how it works: With images and other items, you simply tap and hold your finger on an item. If it's draggable, you'll see it "lift up", as if being peeled off of a lower layer. If you're selecting text, you'll first need to select the text you want, then tap and hold on the selection to "lift up" that text.
Once you've picked up an item, you can drag it anywhere. If you're running in Split View, you can simply drag from the app on one side of the screen and drop it on the other side. It's simple and pretty functional, and is probably just how most of us envisioned using drag-and-drop on iOS.
But Apple's implementation goes way beyond that simple Split View drag. iOS 11 really embraces multitouch in a way that previous versions didn't. While you're holding that selection with one finger, you can perform other operations with your other fingers. This means you could tap on an app and switch to another view, and then drop the content there. You could even swipe up and into the multitasking view, then swipe to a different app, and tap on that app to bring it forward, and then drop the data.
Even better, the multitasking view is spring-loaded. When you drag a selection over an app and wait a moment, that app will zoom forward. This also works if you swipe up to reveal the Dock, then hold your selection over a particular app's icon. That app will zoom forward, ready for your data.
In some apps, such as Photos, you can make multiple drag-and-drop selections by "lifting up" one item and then tapping with another finger on other items to add them to the stack. You can even hand off items from one hand to another, by placing a second finger on the screen, dragging the selection over to your second finger, and then letting go with the first finger. It all feels logical and natural.
Apple has done a remarkable job in implementing drag-and-drop and making it feel natural—at least, after I trained myself to unlearn many of my iOS habits and assumptions built up over 10 years of using a less capable version of the operating system. But a few areas still feel a bit strange. When I drag a selection into another app, sometimes the feedback I receive from the second app about where I'm dropping my data feels inconsistent. For example, in Notes I would often drag a block of text and expect the insertion point to be right under my finger, but it would instead appear a paragraph too high or too low. It's a disconnect that really breaks the illusion.
Your favorite apps won't support drag-and-drop automatically—they'll all need to be updated for iOS 11. One of the things I like about Apple's implementation of drag-and-drop is that apps can decide for themselves what to do with different kinds of data, which allows them to do the right thing when receiving that data. An app that supports rich text can import that rich text, but one that only supports plain text will bring in the plain text instead.
 Jason Snell
 Drag and drop on the iPhone is limited to within the app you are using.
When I dragged an image out of Photos and into a Markdown text editor I use to write stories for the web, I fully expected the app to reject the photo or import something useless like its filename. Instead, the app took the photo, copied it to the same Dropbox folder that my text file was saved in, and inserted the proper Markdown image-referencing code into my file. That's some intelligent app design, but the end result is "it just works" simplicity that all app developers should aspire to.
Given how flexible drag-and-drop is on the iPad, I'm disappointed that Apple didn't embrace cross-app drag-and-drop on the iPhone. Sure, holding a selection while moving across full-screen apps is a bit of a handful—but it's not much more complicated than switching between items in Notes or Mail or Safari or Photos, nor is it more complicated than dragging across a visit to the Dock or the multitasking view on the iPad. Apple should enable this powerful feature for the iPhone, too.
So it took ten years, but at least it's finally here, and it's very good. If you're an iPad user, you may need to take some time to unlearn your old habits and expand your mind to new possibilities. Before you know it, you'll forget the rules of the last decade and begin dragging and dropping with abandon.
Sent with Reeder
Techradar - All the latest technology news 19 essential iPhone 8 tips and tricks
It's a shame the iPhone 8 and iPhone 8 Plus didn't come with all new designs, because while they look like a slightly different iPhone 7 and iPhone 7 Plus there are some massive improvements under the hood: ridiculously fast processors, even better cameras and some brilliant new features.
And here we present 19 ways to make your iPhone 8 / 8 Plus experience even better through a selection of different tips, tricks and handy alternatives to the things you do every day with your handset - use these to become a power user of your new Apple phone.
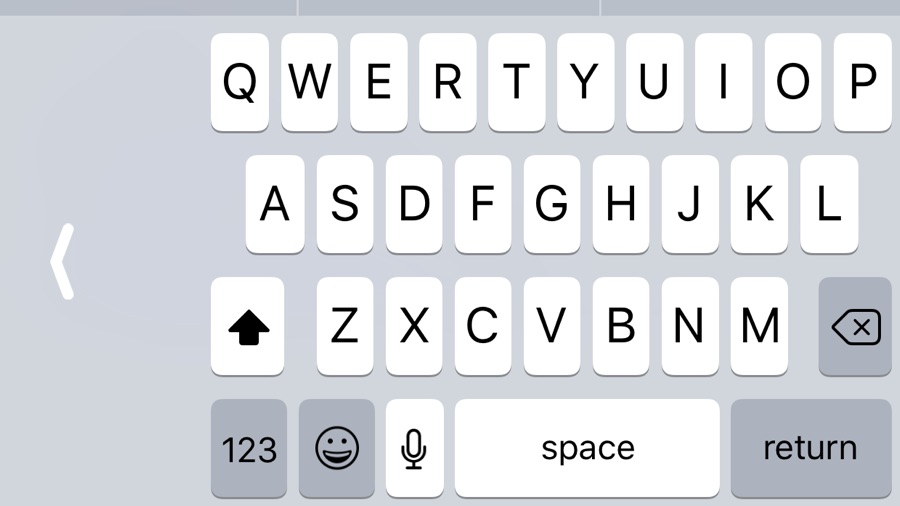
The iPhone 8 is big, and the 8 Plus bigger still. If you're struggling to type one-handed, press and hold the emoji button on the keyboard and you'll see three keyboard icons: a left-hand side keyboard, the current standard keyboard and a right-hand side keyboard. Choose either left or right to squish the keyboard to that side for easier typing.

The redesigned Control Center is much handier than before, and you can make it handier still by changing its contents in Settings > Control Center > Customize Controls. You'll find some interesting options in there, such as the option to add screen recording or control your Apple TV.
iPhones haven't yet got the power to drag and drop between apps, but you can now drag and drop inside Apple's apps – so you can drag an attachment in Mail into a new message, drag text from one Note to another and so on. In Notes, for example, you work in landscape mode and drag an image or text selection out and over the note you want to drop it into; after a second that note opens and you can move your block of text or image to its desired location. In the Files app you can drag items over folders to move them.

Apple is very, very late to the QR code party, but you can now scan QR codes from within the Camera app. It'll automatically recognize that it's looking at a QR code and will then enable you to open the link in Safari, connect to the Wi-Fi network or do anything else the code is designed to do.
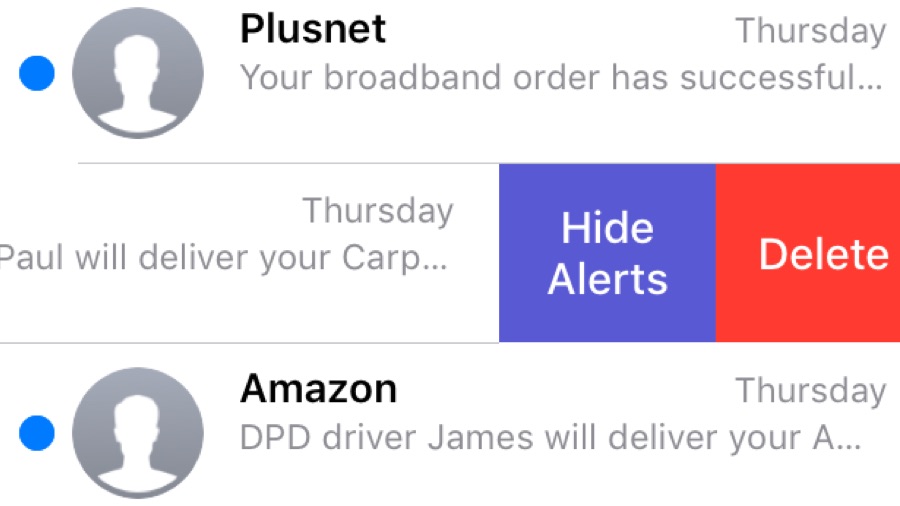
There are new effects in Messages: to see them, hold down the Send icon and tap Screen. You can mute conversations in Messages now too: swipe left on a conversation and tap Hide Alerts.
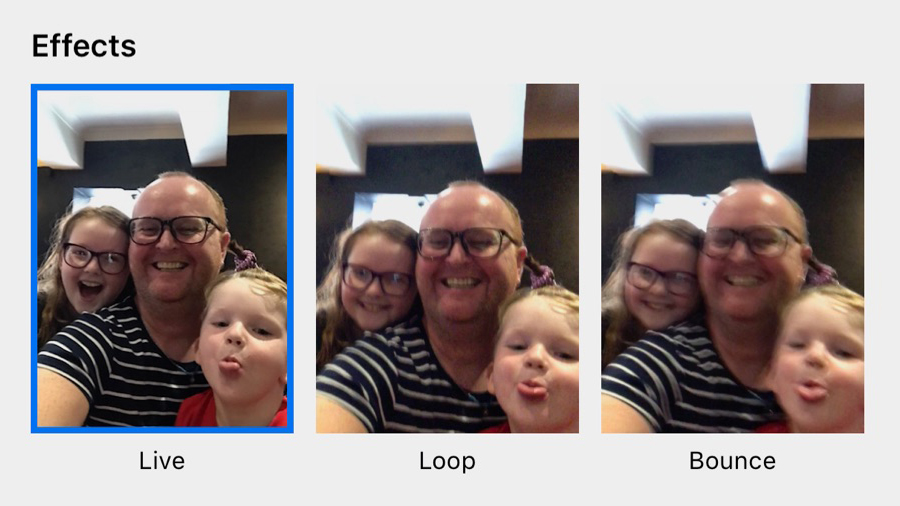
Live Photos are a lot of fun, and they're even more fun on the iPhone 8 and 8 Plus: swipe the photo up to see the effects options, which enable you to loop or bounce your Live Photo, or apply a long-exposure effect.
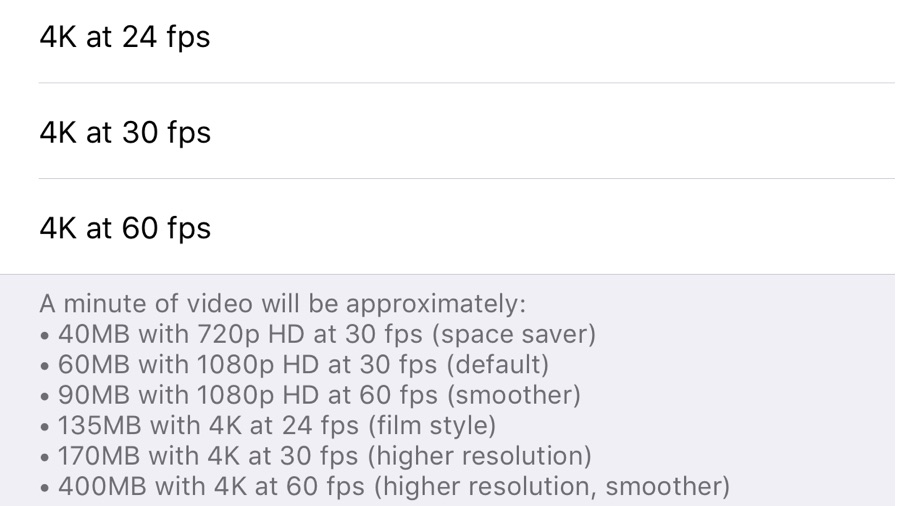
The camera in the iPhone 8 and 8 Plus shoots 4K at 30 frames per second by default, but you can adjust that in Settings > Camera > Record Video to boost the speed to 60fps, drop it to 24fps or use a lower resolution such as 1080p or 720p HD. Naturally, the higher the resolution and frame rate the more space you'll need to store your video.
You've probably seen that both the iPhone 8 and the iPhone 8 Plus support the Qi charging standard, so they'll work with any Qi-compatible pad, including the pads and charging-enabled furniture IKEA sells.
You can also buy an Apple-approved charging pad from Mophie or Belkin for $59.95 / £54.95 / AU$99.95, with Apple's own AirPower pad coming later this year. It's not as fast as charging with a cable, but it's a lot more convenient and Apple reckons it's not far off in terms of speed.

This one's Plus-only, and it's one of the headline features of the phone. Portrait mode has new lighting options that enable you to choose from different studio lighting and stage lighting effects, and the results are instant – there's some serious processing going on to make the magic happen so quickly, and the original data is saved so you can change your mind later.

Photo pros will know about slow sync flash already, because it's something many cameras can do – it's a way of getting more balanced shots when using flash in low light by keeping the shutter open for longer.
In a normal flash photo the subject is brightly lit and the background dark, but with slow sync it's much closer to what you see with your eyes. You don't need to do anything to enable this option – it's just part of the camera.
The iPhone 8 and 8 Plus cameras have been designed for augmented reality (AR) apps thanks to the high power of the A11 Bionic chip. Yes, other phones in the range can do the same, but you'll get the best experience on the latest handsets.
It's a lot of fun, and an exciting glimpse of the future, whether you're looking at IKEA furniture overlaid on your living room or Thomas & Friends Minis on the coffee table.
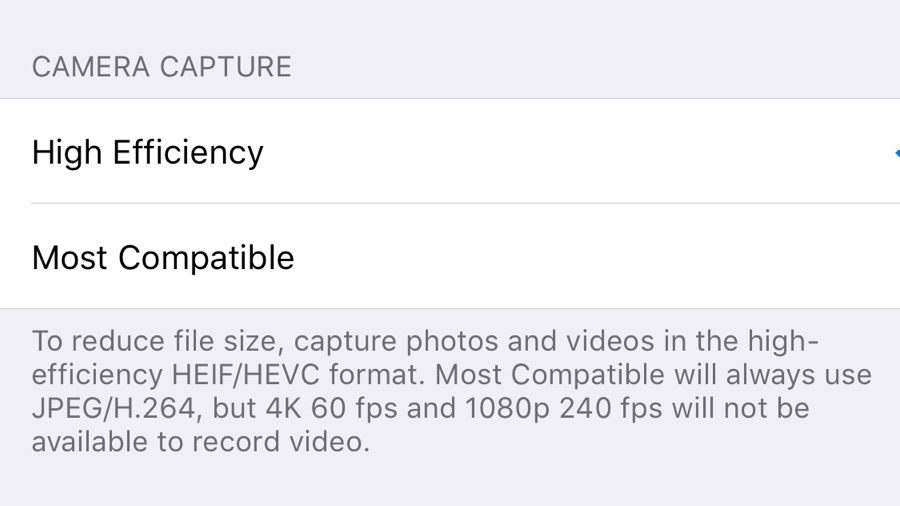
iOS 11 introduced a new, much more efficient file format for photos called HEIF, and it's the default format. However, if you want to store photos in the less efficient but more widely supported JPEG format, you can change the default in Settings > Camera > Formats.
You can do the same with video, changing from HEVC to H.264 as the default. Don't worry about doing this if you just want to share the odd photo – when you share, iOS automatically converts from the high-efficiency format to JPEG or H.264.
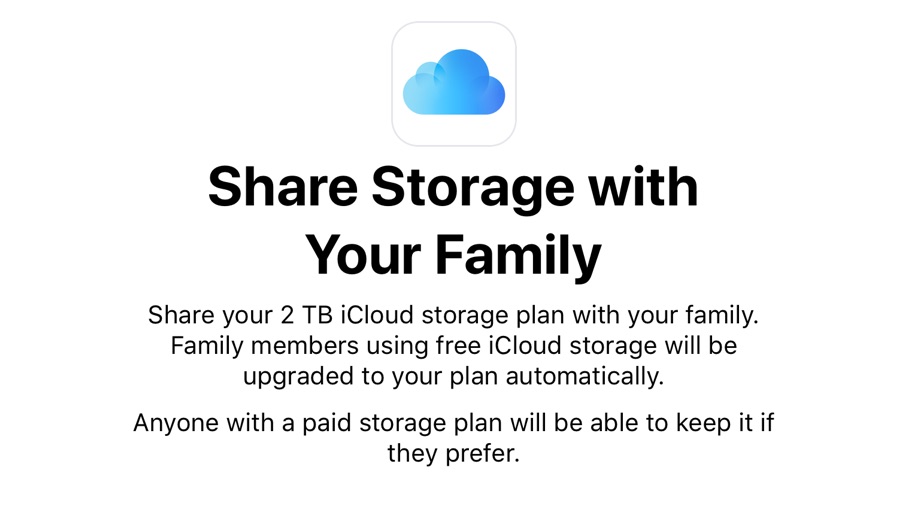
This is a big one for families: you can now share your iCloud space with family members – so, for example, we've got a 2TB plan that we share with the kids.
You can enable this in Settings > iCloud > Manage Storage. Don't worry, your secret iCloud files aren't shared, just your storage space.
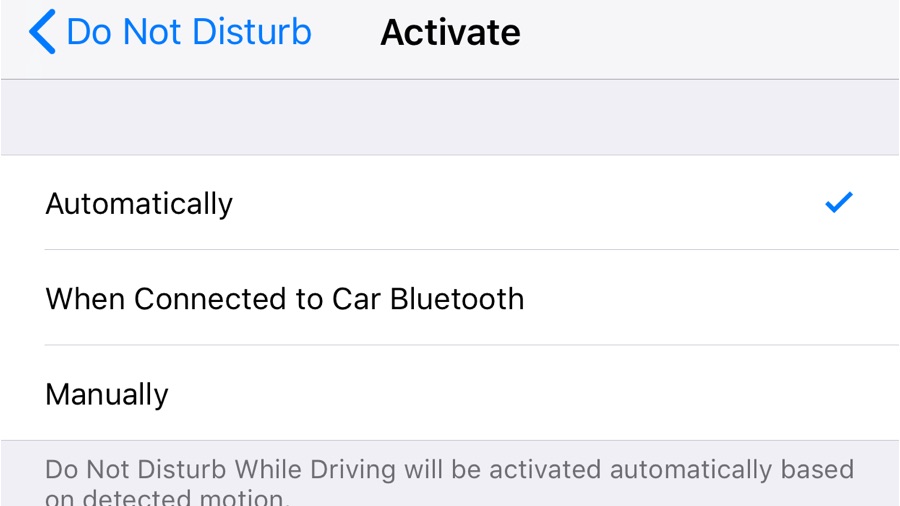
Using your phone while driving is, of course, stupid and dangerous, but if you're not sure that you can avoid temptation then enable Do Not Disturb While Driving in Settings > Do Not Disturb.
The name tells you what it does, but not how clever it is: your iPhone can tell how fast you're moving or whether you're connected to an in-car Bluetooth system, and turn the feature on automatically.
It won't block phone calls, and people can still get hold of you in an emergency. However, be warned: it'll also do the same on a train, which can be annoying on the commute to work and you're sat wondering why nobody loves you.
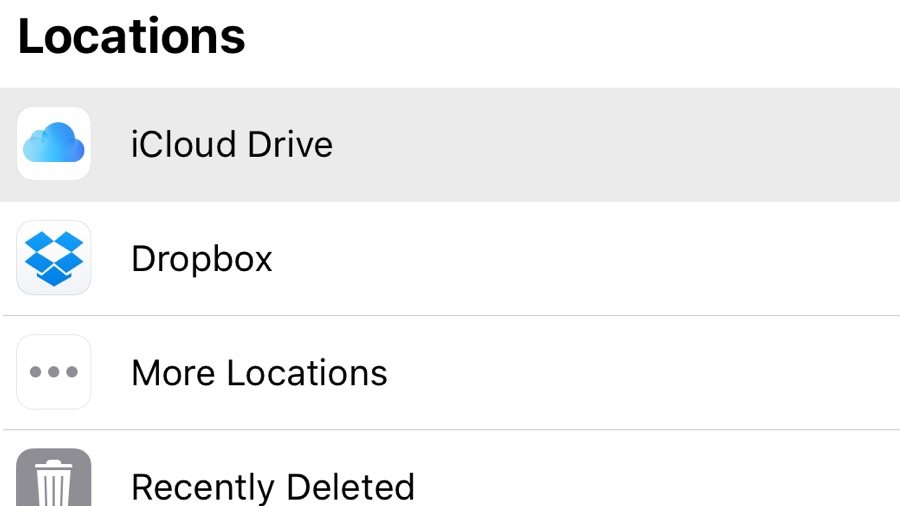
The new Files app is now on iPhone, and it's a handy way of accessing not just iCloud, which is useful in its own right, but third-party services such as Dropbox and Google Drive too.
However, most file transfers will still be handled by the inbuilt 'Share' icon in the relevant apps, rather than using Files, but if you want to share things from Pages or similar, this is the place to come.
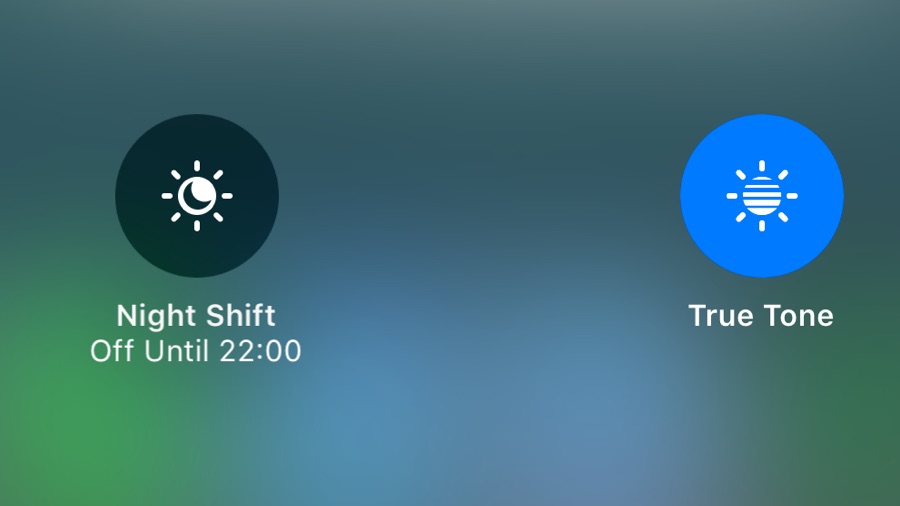
The iPhone 8 and 8 Plus get a smart feature that was previously only for iPads: True Tone display, which adjusts the screen color temperature and brightness based on the ambient lighting conditions.
In the unlikely event that you don't want the colors to be more realistic on the screen, you can toggle it in Settings > Display and Brightness or by pushing hard on the brightness slider in Control Center, through 3D Touch.

If you prefer to adjust the display's brightness yourself rather than leaving it to your iPhone's auto setting, you'll want to know the new location of Auto Brightness – it's been moved out of Settings > Display & Brightness and now lives in Settings > Accessibility > Display Accommodations.

The new Emergency SOS feature, which you can enable in Settings > Emergency SOS, disables Touch ID when activated and can automatically call an emergency number or notify named contacts that you need assistance.
To use it, press the power button five times.
Apple has published a huuuuuuuuuuuge iPhone user guide for iBooks. It's free, and you can get it here.
This article is brought to you in association with Vodafone.
Sent with Reeder
9to5Mac Tips and Tricks: Ten Safari long-press shortcuts for iPhone and iPad
Safari for iPhone and iPad is an incredibly capable mobile web browser despite its simple, straightforward user interface. It is the browser of choice on iOS — in large part because it is the one pre-installed — but very few people know everything you can do with Safari.
Much of Safari's advanced functionality is hidden behind 'secret' long-press gestures that you can't really know about unless you try randomly … or someone tells you. We've rounded up all the Safari long press tips and tricks below, so you can take advantage of all the different shortcuts and features it offers.


You might know about a few of these, but this is a comprehensive list of the various long-press actions hidden inside Apple's mobile browser.
Some have been around for a long time, and at least one is brand new to iOS 11.
These shortcuts apply to iPhone and iPad, so you can use the tips on both phones and tablets. The iPad has a couple unique actions related to the Split View Safari mode.

If you are browsing around the web, clicking through links, you are implicitly building a navigation stack of pages for the current tab. Your browsing will get added to the overall History but you can actually drill-down and see the history of pages on a per-tab basis … using a long-press.
After browsing a little, hold down on either the Back or Forward buttons to show a History pop-up panel. If you press on the back button, you can see the breadcrumb trail of pages that you tapped on to get to the current page.
Similarly, long-press on the forward button to see all the pages that you have navigated away from to get back to the current page in the tab. If you've meandered into the depths of Wikipedia, for instance, this shortcut is a quick way to return to the source article.

On Safari for iPhone and iPad, the normal way to add a bookmark for a webpage is to press the Share toolbar button and scroll through the activity pop-up to select the Add Bookmark option. Using a long-press, you can do the same thing more quickly.
Long-press on the Bookmarks button (which tapping on normally takes you to view your bookmarks) and a new action menu appears. The modal features options to Add Bookmark or Add to Reading List. Saving to Reading List is immediate, whilst tapping the bookmark option will open the usual options view to confirm the name and Favorites folder location.

The Tabs toolbar button is located on the right side of the screen, either at the top on iPad or bottom on iPhone. Tapping it launches the carousel view of preview cards for all the open tabs. However, you can also long-press it to reveal several more options.
Without entering the tab screen, a long-press on the button reveals an action sheet. You can close all open tabs in one tab or close the current tab. You can also quickly open a new tab, either in a normal window or jumping to Private Browsing mode.
If you long-press the Tabs button on iPad, you can also see options for Split View tabs. You can 'Open Split View' if you are currently in full-screen mode, or vice-versa and merge back down into a single view, without having to worry about dragging and dropping tabs to the side of the display.

If you accidentally close a tab and want to get back to it, the standard flow would be to open History and scour through for the web page in the list. You can speed this up considerably with a long press shortcut.
Press and hold on the Add Tab button (+ symbol) to view Recently Closed Tabs. These are the pages that were last opened before a tab was closed. It can come in handy if you accidentally swipe a tab into oblivion or just remember there was something else you meant to check.
The Add Tab button is always visible on iPad; on iPhone, find the + button in the tab overview screen by first tapping on the Tabs button.

If you are already in the Tabs overview screen and want to delete all the open tabs, you can long press on the Done Button and hit 'Close All N Tabs' button in the menu that pops up.
iPad users will also see an option in this menu to Open Split View or Merge All Tabs if Split View is already active.

Tapping on a link in a web page opens it. If instead of tapping you long-press a link, you can access a variety of actions. For starters, the action sheet includes the full URL of the link you have activated, so you can get a better idea about where it will take you.
You can Open it, Open in New Tab or even Add to Reading List without ever opening it. You can Copy the URL to paste into another app, or press Share to reveal the full system share sheet. iPad users can also start a Split View Safari right from this menu.
If the link is related to a third-party app, the action sheet will also include an 'Open in [App name]' to interpret the URL as a deep link.

You can also long-press on images to save them to your photo library or copy them to the clipboard. If the image is hyperlinked, the pop-up menu will also include the standard link shortcuts as described above.
Note that some websites intentionally disable user interaction on images. In these cases, a tap or long-press will do nothing at all.

From the Favorites grid view, which shows by default for new empty tabs, you can drag to re-arrange their order. If you instead simply press down on them, Safari will show a context pop-up menu to Delete or Edit the highlighted site.
For example, if a page appears in the Frequently Visited section that you don't want to see anymore, you can just long-press on it and tap Delete to remove it.

After a page has finished loading, you can long press on the Reload button to find a couple neat shortcuts. You can reload the page and ask Safari to pretend it is a desktop website. This is especially useful on iPad where some sites continue to serve iPad users with website designs optimized for phones. It isn't a foolproof feature, but it does work in many places.
If you have a Content Blocker installed, an option will also appear here to 'Reload Without Content Blockers'.

New to iOS 11, it is actually possible to have Safari automatically launch Reader for select domains. This means you can view a particular website without distractions, in the streamlined reading-focused Safari Reader interface, automatically every single time.
To enable this, navigate to a page that supports Reader. Then, long-press on the Reader icon (three lines) in the URL bar. This will open a pop-up to enable Automatic Reader View. You can choose to enable it just for the current website domain or on any website you visit. Enabling this option means every page will open in Reader view if it is available, and you will have to tap to disable it every single time.
So, there are ten things you can do in Safari with long-press gestures, most are shortcut actions but some are only available with a press-and-hold. Let us know what new Safari features you learned about in the comments below.
Check out 9to5Mac on YouTube for more Apple news:
Sent with Reeder