Other World Computing Blog How to Recover From a White Screen When Booting a Mac
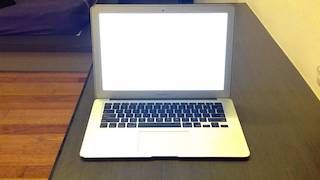
This poor MacBook Air is experiencing the "white screen of death"
From time to time, you may experience one of the more frustrating Mac glitches — a white screen during boot. Usually this rare bug happens after updating macOS to a new version, but it can happen at any time. You'll know when you've been hit by this bug when you boot up your Mac and see a blank white display. There is no Apple logo on this display, nor will you see a progress bar showing where you are in the Mac boot process. It's just…white. In today's article, we'll describe some steps that you can take to recover from the dreaded white screen.
Reboot into Safe Mode
One time-honored trick to recover from a white screen is to boot into Safe Mode. This is very easy to do: simply hold down the shift key on your keyboard as soon as you hear the Mac startup chime. Keep holding down the shift key until the boot progress indicator shows up. This progress bar indicates that Safe Mode is running a directory and disk check on your Mac; this is like running First Aid from the Disk Utility.
Safe Mode is a way to troubleshoot some system problems that can keep your Mac from booting normally. Essentially, Safe Mode disables some macOS features, clears some caches, and prevents some third party kernel extensions from loading, all of which reduce the amount of work the Mac has to perform to get to the login screen. If you can boot a Mac successfully in Safe Mode, you either try to boot the Mac again to see if the next try is successful — perhaps just clearing some caches was what the doctor ordered.
How can you make sure that your Mac booted into Safe Mode? The login screen displays the words "Safe Boot" in red in the upper-right corner, or you can launch Utilities > System Information, then click on Software and see what's listed after "Boot Mode" in the System Software Overview (see image below). If it shows "Safe", then the Mac is definitely in Safe Mode; if it shows "Normal", then the shift key may not have been pressed soon enough.
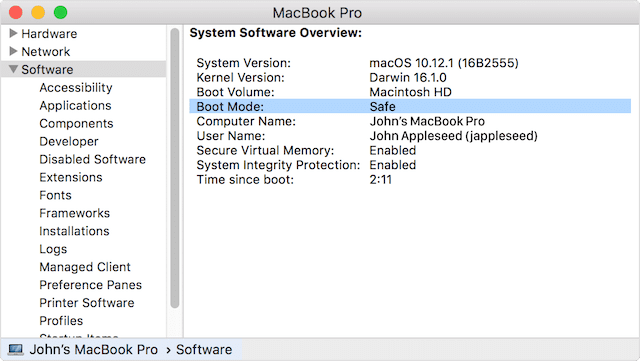
(System Information shows that this Mac has booted into Safe Mode)
If rebooting the machine normally (without Safe Mode) still results in a white screen, then it may be a login item that's causing the Mac to balk at loading. This usually happens after a specific app that's loading at bootup receives a buggy update. If you know what apps were recently updated, try removing them from the list of login items and then reboot normally to see if the problem is fixed.
Removing an item from login items is done by launching System Preferences, then selecting Users & Groups and clicking on Login Items. To remove an item, just highlight it by clicking on the item name, then click the minus sign ( – ) button below the list. After removing a login item from the list and verifying that the system boots normally afterwards, you may wish to contact the developer with a bug report, or try removing and re-installing that app.
Apple's knowledge base has an excellent backgrounder on Safe Mode that's worth reading.
Reset NVRAM
Resetting the non-volatile random access memory (NVRAM) on your Mac can sometimes vanquish the white screen. Those who have been around the Mac world for a long time remember the common term "zapping PRAM" (parameter RAM) — this is essentially the same process with a different name.
So what does resetting NVRAM do for you? NVRAM stores information in between boots of your Mac, things like the startup disk, video and display information, volume for the system startup chime and speaker, time zone information, default system fonts, and more. When resetting NVRAM, this data is all wiped from the Mac so you may need to readjust things like your screen resolution, mouse or trackpad tracking speeds, etc…
To Reset NVRAM, the same old key combination that has been used for generations of Macs — Command + Option + P + R — is used immediately upon reboot. The Mac chimes once to signify that it has begun booting, then a second time to signify that the NVRAM has been reset. After this point, let up on the keys and let the Mac boot as usual.
Resetting NVRAM is often a fast and easy way to get out of the white screen conundrum.
Reset SMC
The SMC in your Mac is the System Management Controller, a low-level component of your Mac hardware that controls and manages system hardware. Resetting the SMC is another tool in your toolbox of white screen solutions. The reset process is different for different Mac models, so be sure to read the section below that pertains to your Mac.
MacBook, MacBook Air, MacBook Pro Retina, or MacBook Pro with internal non-removable battery
For most newer Mac laptops without a removable battery, here's how you reset SMC:
1) Shut down your MacBook
2) Connect the power adapter to the Mac
3) On the keyboard, hold down the Shift + Control + Option keys AND the power button at the same time
4) Release all keys and the power button simultaneously. The charging light on devices with MagSafe adapters may change colors, indicating that SMC has been reset
5) Boot the Mac as usual
The Mac will lose power settings, so if you've customized those settings you'll need to adjust items like sleep again.
iMac, Mac Pro, Mac mini
Apple's desktop Macs use a different process to reset SMC, but it still achieves the same ends:
1) Shut down your Mac
2) Disconnect the power cord
3) Press and hold the Mac power button for 5 seconds
4) Release the button
5) Reconnect the power cord and boot the Mac as usual
MacBook or MacBook Pro with removable batteries
Older MacBooks and MacBook Pros with removable batteries use a process that's similar to that for the desktop Macs:
1) Shut down the MacBook or MacBook Pro
2) Remove the battery pack
3) Disconnect the power cord
4) Press and hold the Mac power key for 10 seconds
5) Release the power key
6) Reinstall the battery pack and reconnect the power adapter
7) Boot the Mac as usual
Reboot and Repair the Boot Disk
The next item on your troubleshooting list should be rebooting and then trying to repair the boot disk by entering into Recovery Mode:
1) Reboot the Mac and hold down Command + R to boot into Recovery Mode
2) When the Utilities screen appears, select "Disk Utility"
3) Select the hard drive, then click "First Aid" to diagnose any disk issues and attempt to repair them.
Sometimes a drive shows many errors or errors that cannot be repaired, which is a sign that your hard disk may be failing. If that's the case, make sure that your backups are up-to-date, then look into replacing the drive. This can be the perfect time to upgrade that smaller, slower drive with a new one from MacSales.com, so be sure to take a look at the storage page on the website to find one that works with your Mac, then check out the installation videos to see how you can do it yourself. If you're not feeling up to the task, check with Apple Support — especially if your Mac is still under warranty — or a local Apple Authorized Service Provider.
Boot the Mac into Verbose Mode
Booting a Mac into Verbose Mode is like booting a Linux machine without the fancy graphical user interface — you just see a lot of text scrolling by quickly, listing all of the various things that are happening during boot. Now there's no good logical reason why this should resolve the white screen problem…but sometimes it does. Mac consultants and developers like Verbose Mode when troubleshooting boot problems, because they can often trace the issue to a particular line of code that's causing the Mac to flake out.
To check out what happens during your Mac boot process and perhaps fix a white screen in the process, hold down Command + V as soon as you power on the machine or immediately after reboot. The screen will go black, and you'll see something that's reminiscent of a 1981 IBM PC booting PC DOS 1.0 (see image below):
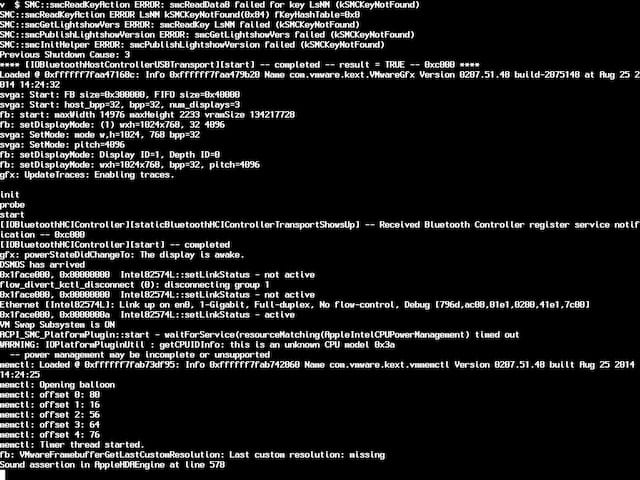
(OS X booting in Verbose Mode)
If your next reboot shows up in Verbose Mode, just reboot again, this time holding down the Command + V key combination to revert to the regular graphical startup screens.
A White Screen with a Flashing Folder Showing a Question Mark
Sometimes you may get a white screen that displays a flashing folder with a question mark on it. That's actually a sign that your Mac can't find a startup disk to boot from. This situation can indicate that a hard drive is failing, or it could just be that you were trying out a lot of troubleshooting tips and the Mac lost track of what the startup disk was.
If this happens, reboot the Mac while holding down the Option key on the keyboard. What should happen is that you'll see icons for all of the available drives to choose from, which on most devices will be one named Macintosh HD. Click on that icon and press the return key, and the device should reboot normally. Should that drive icon not appear, then you likely have a bad or failing SSD or hard drive and should replace it immediately.
When All Else Fails, Try Reinstalling macOS
Maybe none of these tricks work, but you know that the SSD or hard drive is fine. That's when you might want to ensure that your backups are up-to-date and reinstall macOS. You can do a clean install of macOS from a bootable macOS installer drive or use Recovery Mode to erase the drive and reinstall the operating system. Macs that are still experiencing the "white screen of death" after a complete operating system reinstall likely have hardware issues that will need to be resolved by Apple or an authorized service provider.
Do you have your own tips on banishing the white screen? Let us know in the comments below.
http://feedproxy.google.com/~r/owc/~3/3WTwr409pZ0/40844-how-to-recover-from-a-white-screen-when-booting-a-mac
Sent with Reeder
Aron


