Other World Computing Blog How to Archive Mac, iOS Notes by Exporting Them as PDFs
![]() Many Apple fans love the Notes app in macOS and iOS. It's easy to use, it's surprisingly powerful, and since it is cross-platform, a note saved to iCloud on one device shows up on all devices logged into the same Apple ID. There may come a time when you want to archive a note that you've created, and a great way to do that is to export the note as an Adobe Portable Document Format (PDF) file. That file takes on all of the characteristics and formatting of the original note, and it can be viewed on any computer platform. Here's how to archive your notes in Notes on both macOS and iOS.
Many Apple fans love the Notes app in macOS and iOS. It's easy to use, it's surprisingly powerful, and since it is cross-platform, a note saved to iCloud on one device shows up on all devices logged into the same Apple ID. There may come a time when you want to archive a note that you've created, and a great way to do that is to export the note as an Adobe Portable Document Format (PDF) file. That file takes on all of the characteristics and formatting of the original note, and it can be viewed on any computer platform. Here's how to archive your notes in Notes on both macOS and iOS.
macOS
1) Launch Notes on your Mac
2) Select the Note that you wish to archive as a PDF file
3) Select File > Export as PDF from the menu bar
4) In the Save As dialog that appears, you can type in a name for the PDF file or retain the existing Note title (see screenshot below)

(When exporting a Note as a PDF file, you can change the file name to something other than the Note title.)
5) The file is saved as a PDF, and all original formatting is retained. Images that were pasted into the note expand to fill a full "page" of the PDF document, meaning that they're usually more readable than the original note (see PDF screenshot below):

(All formatting is retained in the PDF, but images pasted into a note will expand to fill a PDF page.)
Using Export to PDF produces a similar result to using Print and selecting to Print as PDF, but is faster.
iOS
Since iOS 11, it's possible to export notes on your iPhone or iPad to PDF files easily. That's great for folks who may own an iOS device, but aren't Mac users.
1) Launch the Notes app
2) Select the note you wish to turn export as a PDF file
3) Tap the Share button in the upper right corner of the iPhone or iPad screen (see image below)

(Tap the Share button to see the Create PDF button.)
4) In the share sheet that appears, scroll the bottom "line" of button to get to the Create PDF button (outlined in red in the image below), then tap it.

(Tap the Create PDF button.)
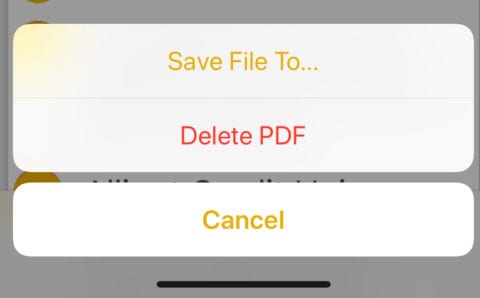
Unlike macOS, iOS does not immediately ask you for a file name. Instead, the PDF file is created and displayed on your iOS device screen. To save the file, tap "Done" above the upper right corner of the PDF, and the options to "Save File To…" or "Delete PDF" appear (see screenshot below):

(Tapping "Done" on the PDF displays this dialog.)
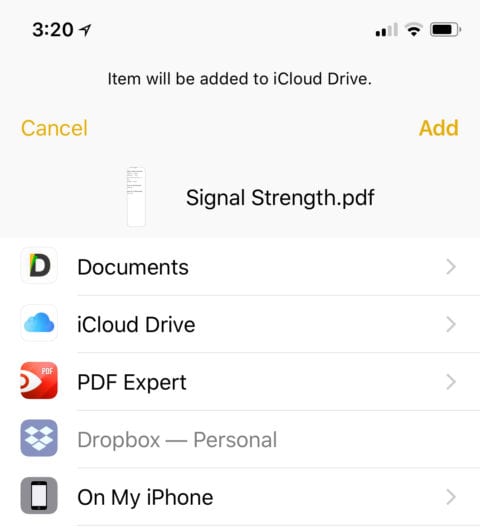
5) To save the PDF file, tap the "Save File To…" button, and the following dialog appears (see screenshot below):

(iOS allows you to save a PDF to compatible apps on the device or to cloud services.)
Tapping on iCloud Drive allows you to select the exact folder into which the PDF is saved. Other compatible apps and cloud services also appear on this screen.
Now that you know how to archive old notes as PDF files, perhaps it's time to clean up some of those notes that no longer have much value but you just didn't want to delete.
http://feedproxy.google.com/~r/owc/~3/-dyxRwtKxRY/45096-how-to-archive-notes-by-exporting-them-as-pdfs
Sent with Reeder
No comments:
Post a Comment